Getting great photography shots in 2025 doesn’t require a fancy degree or a camera that costs more than your car. It’s really about understanding some basic ideas and putting them into practice. We’ll go over some simple tips to help you take pictures that look good, whether you’re just starting out or have been shooting for a while. Think of this as your friendly guide to making your photography pop.
Key Takeaways
- Get comfortable with your camera’s basic settings, especially the different modes and how aperture, shutter speed, and ISO work together.
- Learn to arrange elements in your photos using techniques like the rule of thirds and leading lines to make them more interesting.
- Pay attention to light; shooting during the golden hour or using overcast days can make a big difference in your photography.
- Focus on your main subject clearly and understand how to control what’s sharp and what’s blurry in your images.
- Practice regularly, try different photography challenges, and learn from other photographers to keep improving your skills.
Mastering Camera Fundamentals
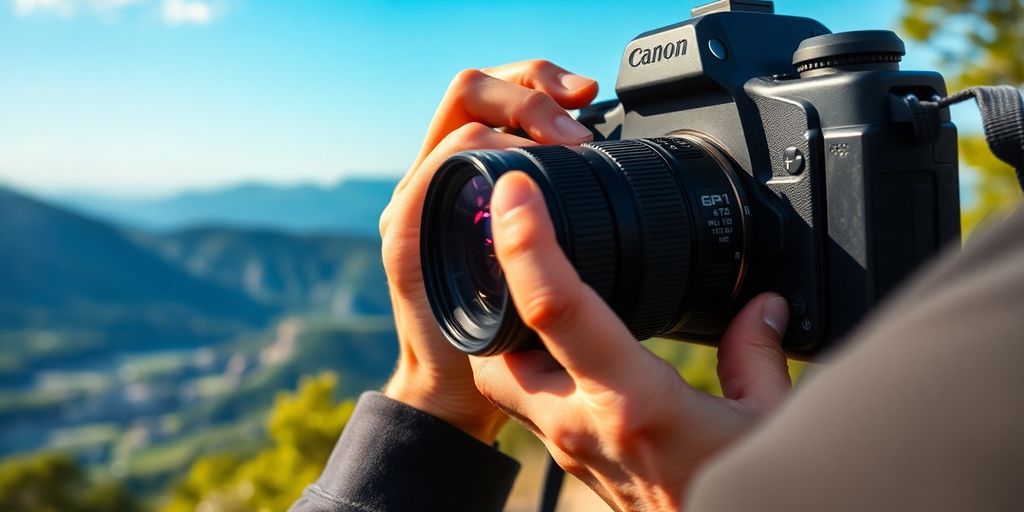
Before you can create amazing photos, you need to understand the tool you’re holding. Your camera might look intimidating with all those buttons and settings, but the core concepts are pretty straightforward once you break them down. Think of your camera as a tool. Whether you’ve got a smartphone, point-and-shoot, or DSLR, the same basic principles apply everywhere. Light enters through the lens, hits the sensor, and creates your image. That’s really all there is to it. Most beginners get caught up obsessing over technical specs and miss what’s actually important: knowing how to use your camera matters way more than owning the latest, most expensive model. Start with whatever you have right now. A basic camera in the hands of someone who knows what they’re doing will always beat a high-end camera collecting dust because the owner got intimidated by all the controls. You can find some great beginner tips for getting started with your camera.
Understand Your Camera Modes
Understanding different shooting modes gives you more creative control as you develop your skills. Each mode offers varying levels of automation versus manual control:
- Auto Mode: Works great when you’re starting out, but it limits your creative options since the camera makes all the decisions.
- Program Mode: Lets the camera pick aperture and shutter speed while you control ISO and other settings. It’s a good middle ground.
- Aperture Priority Mode: You choose the aperture (which controls depth of field), and the camera selects the right shutter speed. This is where many photographers find their creative freedom.
- Shutter Priority Mode: You pick the shutter speed (great for controlling motion), and the camera chooses the aperture.
- Manual Mode: Gives you complete control over everything, but save this for when you really understand the basics.
Start with Aperture Priority once you’re comfortable with the fundamentals. This mode gives you creative control over how much of your photo stays in focus while letting the camera handle the technical stuff.
Master The Exposure Triangle
Three settings control whether your photos turn out bright or dark: aperture, shutter speed, and ISO. Think of them as teammates that need to work together.
- Aperture: Controls depth of field. Low numbers like f/1.8 create that dreamy blurred background effect, while higher numbers like f/8 keep everything in your scene sharp from front to back.
- Shutter Speed: Controls motion. Fast speeds like 1/500th of a second freeze action completely, while slower speeds create artistic motion blur.
- ISO: Makes your camera’s sensor more sensitive to light. Low numbers like 100 produce clean, crisp images, while higher numbers let you shoot in darker conditions but add grain to your photos.
These three always work as a team. Change one setting, and you’ll probably need to adjust the others to keep your exposure looking right. Practice switching between different modes until this relationship starts feeling natural.
Control Depth of Field
Understanding depth of field separates beginners from photographers who really know their craft. Wide apertures (low f-numbers) create shallow depth of field that blurs backgrounds beautifully. Narrow apertures (high f-numbers) keep everything sharp throughout your scene.
Use shallow depth of field to isolate subjects from busy backgrounds. Use deep depth of field for landscapes where you want everything in focus from foreground elements to the distant horizon. Your distance from the subject also affects depth of field. The closer you get to your subject, the more background blur you’ll achieve at any given aperture setting.
Elevating Your Photography Composition
Apply The Rule of Thirds
This is a classic for a reason. Imagine your photo frame is split into nine equal parts by two horizontal and two vertical lines. The idea is to place your main subject or points of interest along these lines or where they intersect. It’s not about making everything perfectly centered. For instance, when shooting a landscape, try putting the horizon on the top or bottom line, not smack in the middle. This simple shift makes your photos feel more balanced and engaging. Most cameras have a grid overlay option that can help you visualize this as you shoot. Don’t be afraid to break this rule sometimes, though. Centering a subject can create a really powerful, direct look, but knowing the rule first helps you break it with purpose.
Utilize Leading Lines
Think of leading lines as visual pathways in your photo. These can be anything from a winding road, a fence, a riverbank, or even shadows. The goal is to use these lines to guide the viewer’s eye through the image, usually towards your main subject. Diagonal lines are particularly good at adding a sense of movement and energy. Horizontal lines tend to feel calm, while vertical lines can suggest strength. Finding these lines can really make a scene pop and give your photos more depth. It’s about showing people where to look without them even realizing it. You can find great examples of this technique when looking at landscape photography.
Frame Within a Frame
This technique uses natural elements in your scene to create a border around your subject. Think of shooting through a doorway, a window, or even between tree branches. This adds a layer of depth to your photo and helps to draw attention directly to what’s inside the frame. It’s like giving your subject a spotlight. However, don’t force it. If you have to contort yourself or the camera to make it work, it might look unnatural. Look for opportunities that present themselves organically. When you find a good natural frame, it can really make your subject stand out.
Composition is really about how you arrange the elements within your photograph. It’s not just about what you shoot, but how you choose to show it. Playing with these compositional ideas can transform an ordinary scene into something quite special.
Harnessing Light for Stunning Photography
Light is pretty much everything in photography, right? Get it wrong, and even the best camera and composition won’t save your shot. But nail the lighting, and you can make even a simple scene look amazing. It’s all about understanding how light behaves and using it to your advantage.
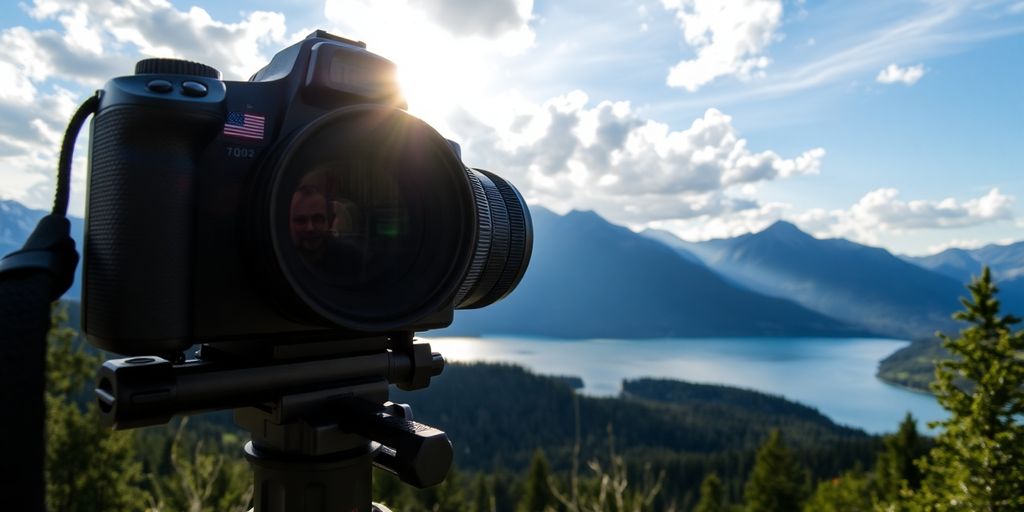
Capture The Golden Hour
This is that magical time just after sunrise and right before sunset. The sun is low, so the light is soft, warm, and casts long shadows. It makes colors pop and gives everything a really nice, gentle glow. It’s perfect for portraits because it’s forgiving on skin tones and adds a professional feel. You can get some really dramatic shots with backlighting too, but watch out for silhouettes unless that’s what you’re going for. Planning ahead is key here; know when golden hour is happening at your location.
Embrace The Blue Hour
This is the short period after sunset (or before sunrise) when the sky isn’t totally dark but has a deep blue hue. It’s fantastic for cityscapes or buildings because the artificial lights start to balance with the natural ambient light. It creates a really moody, atmospheric look that’s hard to beat. It usually only lasts about 20-30 minutes, so you have to be ready.
Avoid Harsh Midday Sun
Honestly, try to steer clear of shooting directly under the midday sun if you can. The light is coming straight down, which creates really unflattering shadows, especially under people’s eyes and noses. It also tends to wash out colors and makes people squint. If you absolutely have to shoot then, look for open shade, like under a tree or awning, or use a reflector to bounce some light back and soften those hard shadows. You can also use fill flash to help.
Leverage Overcast Lighting
Don’t discount cloudy days! They’re actually pretty great for photography. Clouds act like a giant, natural softbox, spreading the light evenly. This means you get smooth, diffused light with no harsh shadows. It’s ideal for portraits or close-up shots where you want to capture fine details and natural expressions without any distracting contrast. You can get some really beautiful, soft images on days like these. It’s a good time to experiment with HDR landscape photography if you’re into that.
Light direction really changes the feel of a photo. Front light is okay, but side light adds dimension and mood. Backlighting can be dramatic, but you need to manage your exposure carefully to avoid losing detail or creating unwanted silhouettes. Try shooting the same subject with light coming from different angles to see how much it impacts the final image.
Essential Photography Techniques
Focus Where It Counts
Getting your subject sharp is pretty important, right? Most cameras have different ways to focus, but using a single focus point gives you the most control. Put that point right where you want the sharpest part of your image to be. If your subject is moving, switch to a continuous focus mode; it’ll keep tracking the movement. For things that aren’t moving, the single-shot mode locks focus when you press the shutter halfway down. Don’t forget you can always switch to manual focus, especially when the light is low or you’re shooting through something like a fence or glass where autofocus can get confused.
Here’s a quick look at focusing for different shots:
- Portraits: Always aim for the eye closest to you. It makes the photo feel more connected.
- Landscapes: Try to get everything sharp from the front to the back. This is called hyperfocal distance focusing.
- Action: Use continuous autofocus with tracking if your subject is moving a lot.
- Macro: Manual focus is often best for those tiny details.
- Low Light: Single-point autofocus with an AF assist beam can really help.
Mastering Motion and Timing
Sometimes, the best photos happen in a split second. You need to be ready for that perfect moment when everything just clicks. It could be a genuine laugh, the best light hitting your subject, or the peak of an action sequence. For moving things, try panning. Follow your subject with the camera while using a slower shutter speed. This keeps the subject clear but blurs the background, showing movement. Instead of just holding down the shutter button, watch the scene and anticipate the right moment. Being deliberate usually gets you better results than just taking tons of pictures.
Understanding Light Direction
Light direction changes everything about your photo. Shooting with light directly in front can be okay, but it often makes things look flat. Light from the side creates more shape and mood. Light from behind can be dramatic, but you need to adjust your camera settings carefully to avoid turning your subject into a silhouette, unless that’s what you’re going for. Try shooting the same thing with light coming from different angles. You’ll see how much the mood changes.
Overcast days are actually great for portraits. The clouds act like a big, soft light source, giving you even light without harsh shadows. This is perfect for capturing details and natural expressions.
It’s all about how the light hits your subject.
Avoiding Common Photography Pitfalls
Resist Including Everything
It’s easy to get excited and want to cram every single thing you see into one photo. You know, the whole scene, the whole story, everything. But honestly, that just makes for a messy picture. Try to pick one thing that’s really important and make that the star. Get closer. Seriously, just take a few steps forward. You’d be surprised how much better a photo looks when you’re not trying to show the entire universe. Think about what you’re trying to say with the image and only include what helps tell that story. Everything else is just noise.
Minimize Distracting Backgrounds
Your background is just as important as your subject, even if you don’t think so. A messy background with random stuff going on can totally ruin an otherwise good shot. Always, always check the edges of your frame before you press the button. Sometimes, just crouching down or standing on something to get a different angle can turn a cluttered background into a nice, clean sky or a simple wall. It makes a huge difference.
Prevent Over-Processing
We’ve all seen those photos that look like they’ve been run through every filter imaginable, right? They just scream ‘amateur.’ It’s tempting to go wild with editing, but subtle adjustments are usually best. You want your photo to look better, not completely different. Think about making small tweaks that bring out the best in the original image, rather than trying to transform it into something it’s not. Keep it looking natural and authentic.
Building Your Photography Skills
Getting better at photography isn’t just about buying new gear; it’s mostly about putting in the time and trying different things. You’ve got to practice, and not just when the light is perfect or you’re on vacation. Think of it like learning an instrument – you wouldn’t expect to play a concert after one lesson, right? Same with cameras.
Practice Daily Photography
Seriously, shoot something every single day. It doesn’t have to be a masterpiece. Photograph your coffee cup, your pet, the view from your window. The goal is to get comfortable with your camera, to learn how it reacts, and to start seeing the world through a photographer’s eye. Try setting small, manageable goals for yourself. Maybe one week you focus on capturing textures, or you spend another week trying to get interesting shots using only black and white. These little exercises really add up.
Engage in Photography Challenges
Challenges are a fantastic way to push yourself and learn new skills. They give you a specific focus and can help you break out of a creative rut. Here are a few ideas to get you started:
- 365 Project: Take one photo every day for a year. It builds discipline and shows your progress over time.
- Single Lens Challenge: For a month, only use one focal length (like a 50mm lens). This forces you to move your feet and really think about composition.
- Color Study: Pick a color and try to incorporate it into every photo you take for a week.
Don’t get discouraged if your early attempts aren’t what you hoped for. Every photographer, even the pros, started somewhere. The key is to keep shooting and learning from each experience.
Study Admired Photography
Look at the work of photographers whose images you really like. Don’t just glance at them; really study them. What is it about that photo that grabs you? Is it the way the light falls, the arrangement of elements, or the emotion captured? Try to figure out why it works. You can find great inspiration on sites like Instagram, Flickr, or even in photography books. Analyzing the work of others is a great way to learn new techniques and develop your own visual style. It’s like learning from the masters, but you can do it right from your couch. Check out some amazing shots at photography websites.
Smart Photography Equipment Choices
When you’re starting out in photography, it’s easy to get caught up in the idea that you need the fanciest gear to take great pictures. But honestly, that’s not really the case. Focus on learning the craft first, and let your equipment choices follow your needs. You don’t need a top-of-the-line camera to create stunning images; even a good smartphone can teach you a lot about composition and light. If you’re looking to upgrade from your phone, a basic DSLR or mirrorless camera with a kit lens is more than enough to get you going. These cameras are versatile and can handle a wide range of situations. Remember, mastering the fundamentals of photography matters way more than having the latest gadget.
Start With Essential Gear
Don’t feel pressured to buy everything at once. A solid starting point includes a camera body and a versatile lens, like a 50mm prime or a standard zoom. These allow you to explore different types of photography without being limited. Think about what you enjoy shooting most. If it’s landscapes, a wide-angle lens might be a good addition down the line. If portraits are your thing, a lens with a wider aperture will help you get that nice background blur. It’s about making smart choices that support your growth as a photographer, not just buying the most expensive items you can find. You can check out what gear other photographers use for inspiration, but always tailor your choices to your own journey. See travel blogger gear.
Invest in Learning First
Before you spend a fortune on new cameras or lenses, consider investing in your knowledge. Books, online courses, and workshops can teach you so much about camera settings, composition, and lighting. These skills are what truly make a difference in your photos, far more than any piece of equipment. Think of it like this: a great chef can make an amazing meal with basic tools, but a novice chef will struggle even with the best kitchen. Your camera is just a tool; your vision and understanding are what bring the image to life.
Select Key Accessories
Once you have a basic setup, a few accessories can really help your photography. A sturdy tripod is a game-changer, especially for low-light shots or when you want to try long exposures. Don’t skimp here; a wobbly tripod is more frustrating than helpful. Extra batteries and memory cards are also a must-have to avoid missing those perfect moments. A simple lens hood can reduce glare and protect your lens from accidental bumps. These items are practical and can significantly improve your shooting experience without costing a fortune.
Wrapping Up Your Photographic Journey
So, that’s a wrap on our guide to taking better photos. Remember, getting those stunning shots isn’t some big secret. It’s really about getting comfortable with your gear, playing around with how you frame things, and paying attention to the light. Don’t get too hung up on fancy equipment; your phone camera is a great place to start learning. Keep practicing, even with everyday stuff. Try out different settings, see what happens, and don’t be afraid to mess up. That’s how you learn. The more you shoot, the more you’ll start to see the world differently and capture those moments that really stand out. Keep at it, and you’ll be surprised at what you can create.
Frequently Asked Questions
What is the exposure triangle and how do I use it?
Think of aperture, shutter speed, and ISO as a team. When you change one, you often need to adjust the others to get the right brightness. For example, if you make the hole in your lens smaller (higher f-number), you might need to use a slower shutter speed or increase the ISO to let in more light.
What is the ‘rule of thirds’ and why should I use it?
The rule of thirds is like drawing a tic-tac-toe grid on your photo. Try to place your main subject on one of the lines or where the lines cross. This usually makes your picture more interesting than just putting everything in the middle.
What is the ‘golden hour’ and when should I shoot during it?
The ‘golden hour’ is the time right after sunrise or before sunset. The light is soft and warm, making everything look really nice and colorful. It’s great for portraits because it’s easy on people’s faces and creates beautiful shadows.
Where should I focus my camera?
When you focus, make sure the most important part of your picture is super clear. For people, focus on their eyes. For landscapes, try to get both the front and the back of the scene sharp. Using your camera’s focus points helps you choose exactly what should be clear.
How can I avoid distracting backgrounds and too much clutter in my photos?
Try to avoid pictures where the main subject is tiny and lost in a lot of stuff you don’t care about. Also, look at what’s behind your subject. If there’s a messy or distracting background, try to move yourself or your subject so it looks cleaner, or use a setting that blurs the background.
How can I get better at photography?
Practice makes perfect! Take photos every day, even of simple things. Try photo challenges, like only using one lens for a month or taking a picture every day for a year. Also, look at photos you really like and try to figure out what makes them good.